Recently my 30 inch Dell 3008WPF monitor just died on me. I bought it second hand in 2007 and it has served me faithfully for almost 9 years. This monitor is quite expensive so I decided to do a little bit of internet searching to see if there was an available fix.
Faulty Power Board
Luckily I found a few webpages that discussed a common manufacturing flaw in the monitor's power board (the unit you plug your power lead into).
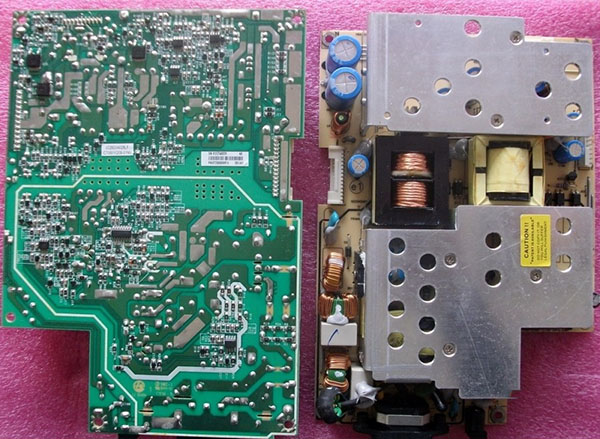
The Power Supply Board 0728D04205 (courtesy of sparepartsmall.com)
The guides
The site where I bought my replacement power board (cost me $89 USD and promptly arrived in 8 days).
The entire walkthrough
First remove the stand from the back of the monitor. You will need a star shaped screwdriver for this. This is the only place where you need a special shaped screwdriver head.
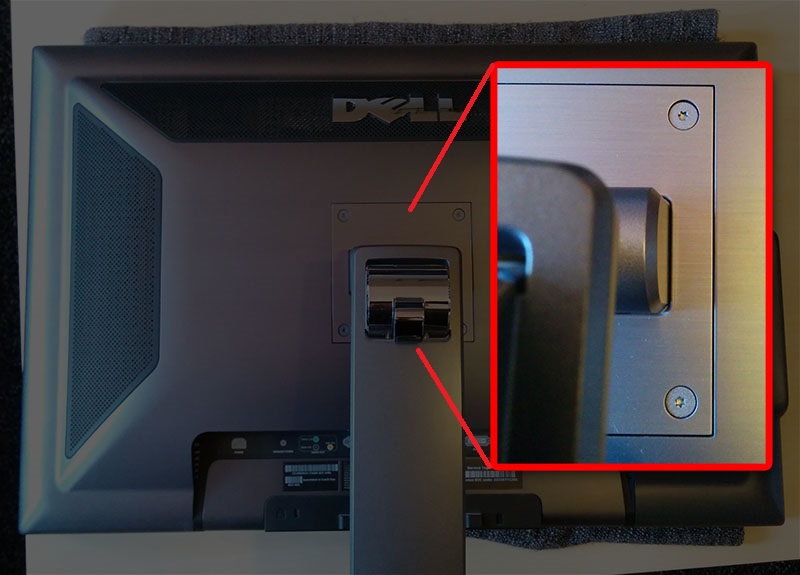
Special star shaped screws
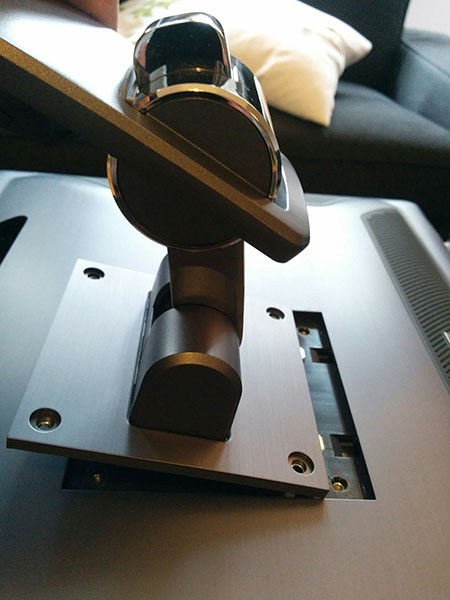
Tilt the stand up and slide it down. It comes off easily.
Remove the front bezel with a flat semi rigid instrument. I used a metal spatula. This takes quite an effort and it is best to have a few pieces of cardbord to push under each corner as it comes free. You're going to scratch the sides of your monitor, it is unavoidable.
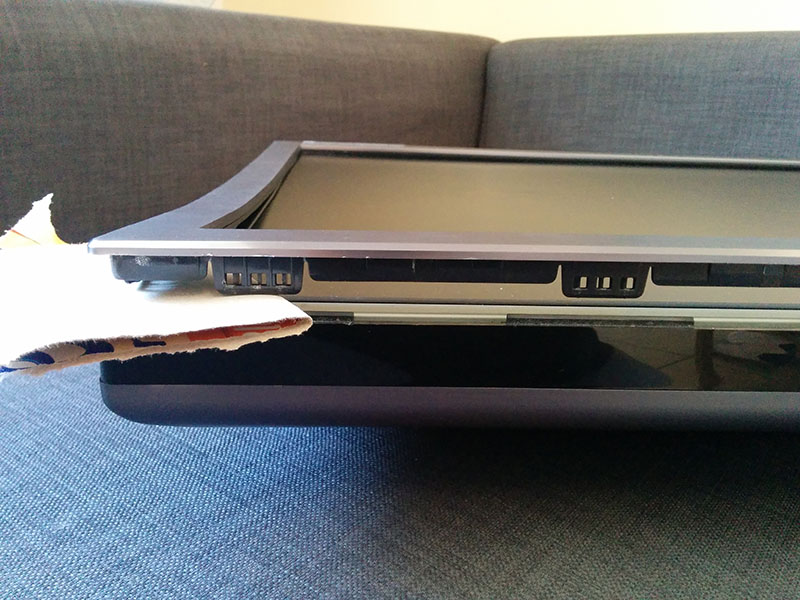
The bezel can lift quite a bit. Slide pieces of cardboard underneath the corners after prying them loose.

Bezel removal complete. Image courtesy of Embalse (forums.overclockers.co.uk)
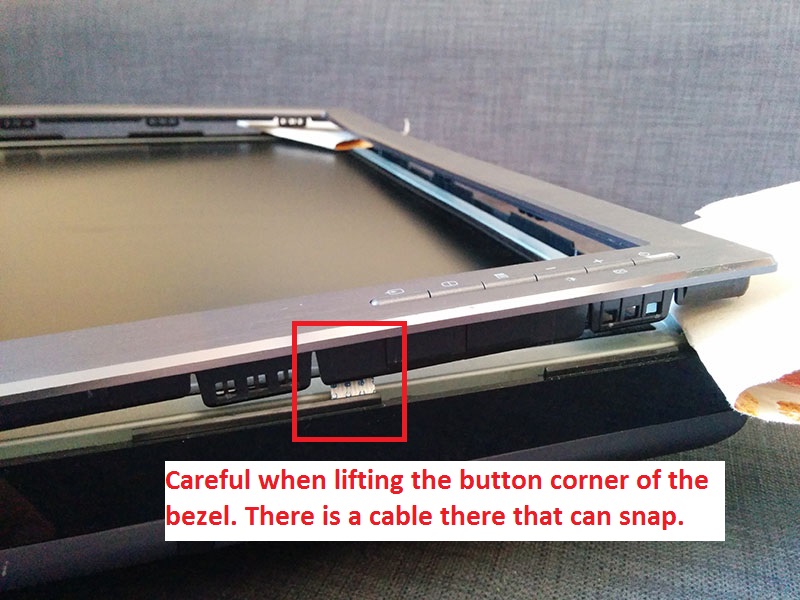
Careful not to snap the wire going to the front buttons when lifting the bezel
Flip the entire screen over. Take care to hold the bezel in place when you flip it.
Now the back plate will be loose, remove it. It may require you to lift the side which does not have the card-reader/usb ports and sliding the back towards the other side. It should come off without much force.
Careful as the ports on the back of the monitor can catch on the frame and make it difficult to get the back off.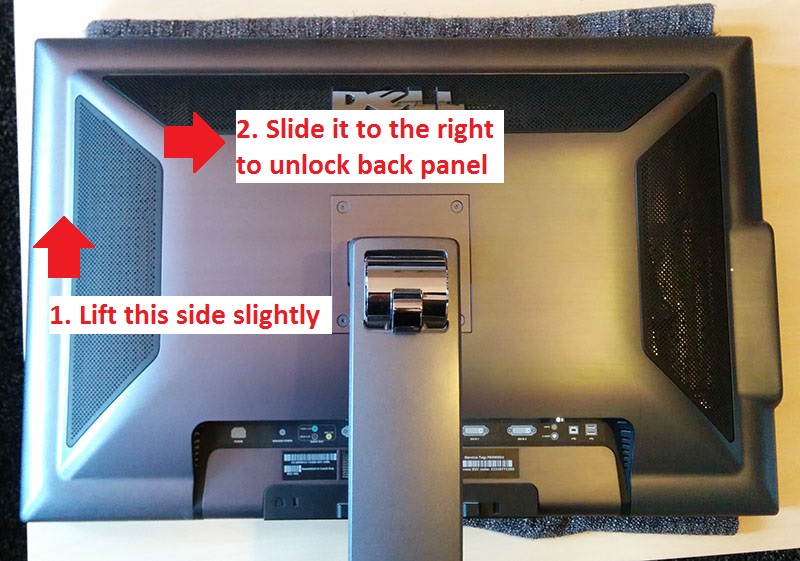
Lift and slide the panel towards the usb/cardreader ports
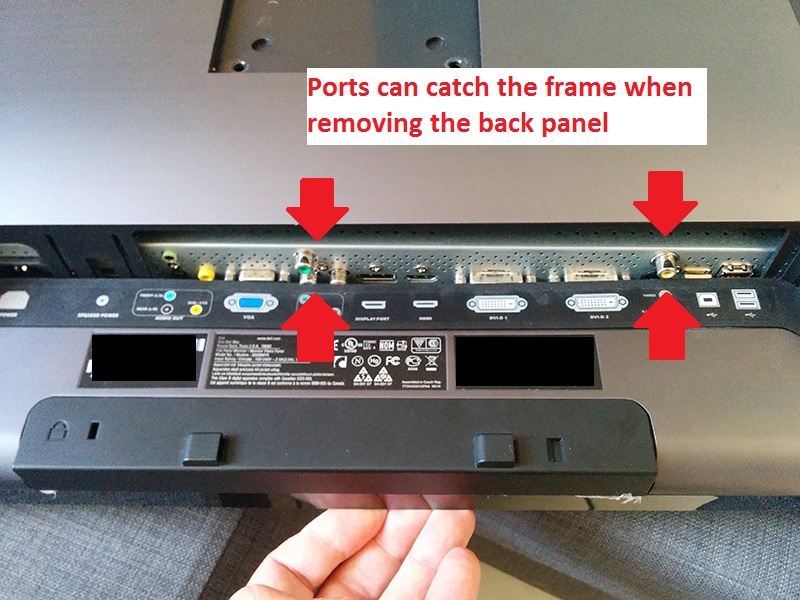
Ports can catch the frame when removing back panel
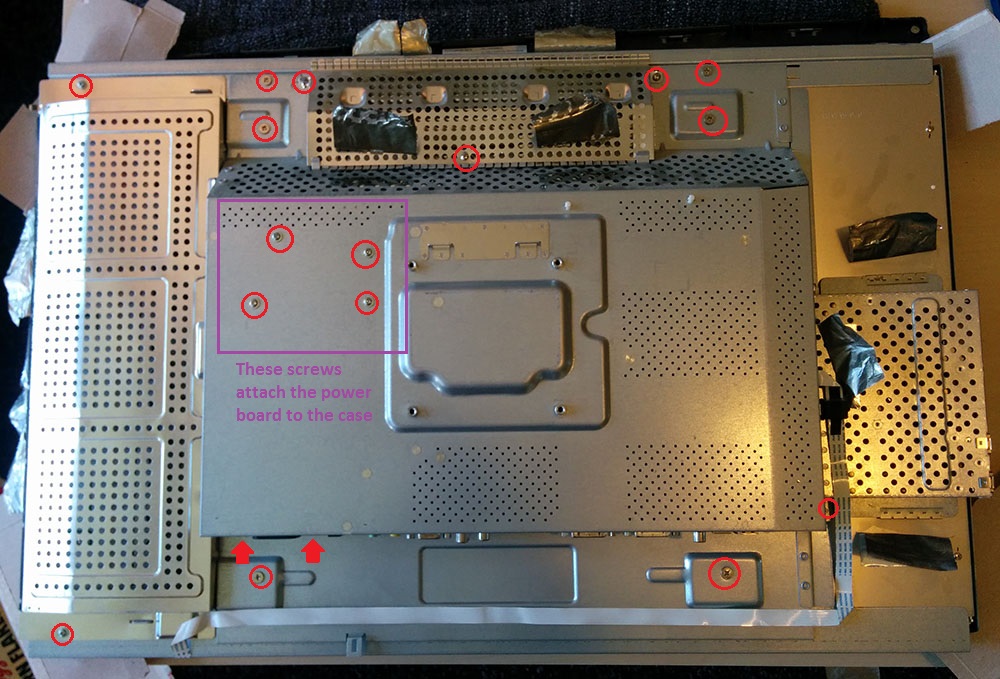
Detach the screws highlighted in red. There area also two screws next to the power socket (indicated by the two red arrows).
Remove all screws highlighted
Remove all the tape attached to the panels and carefully detach the white ribbon from the metal as well (after detaching from the side). Make sure you remove the aluminum tape completely as it will not stick again and might hinder airflow to your monitor after assembly.
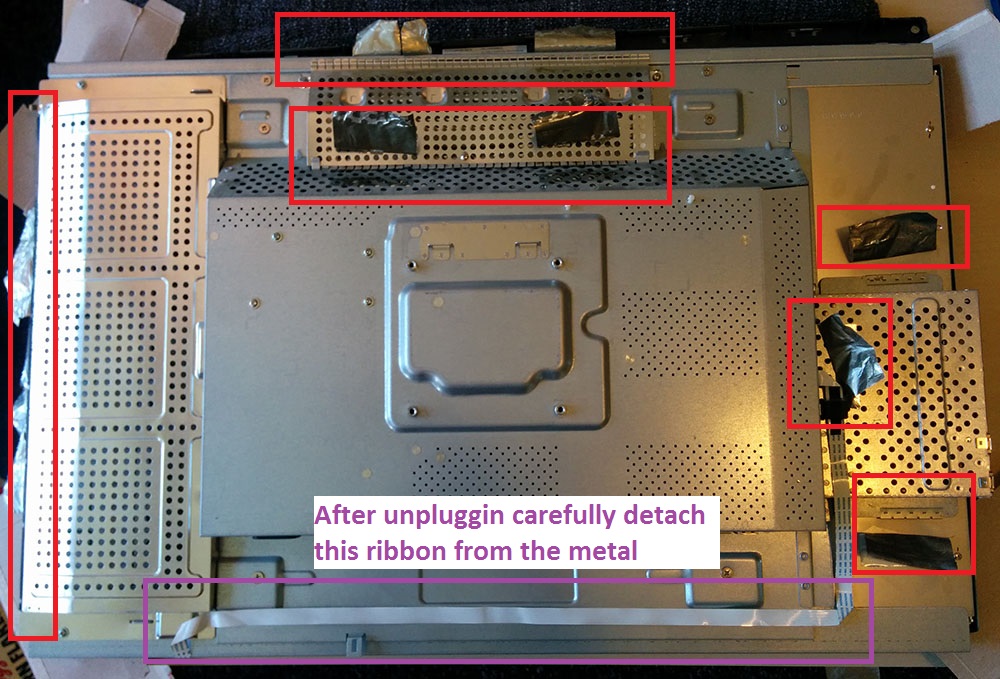
Remove all tape highlighted
Slide the wire meshes out of their locks and detach. The top mesh might be a bit difficult to lift as it is glued down using double side tape on the inside.
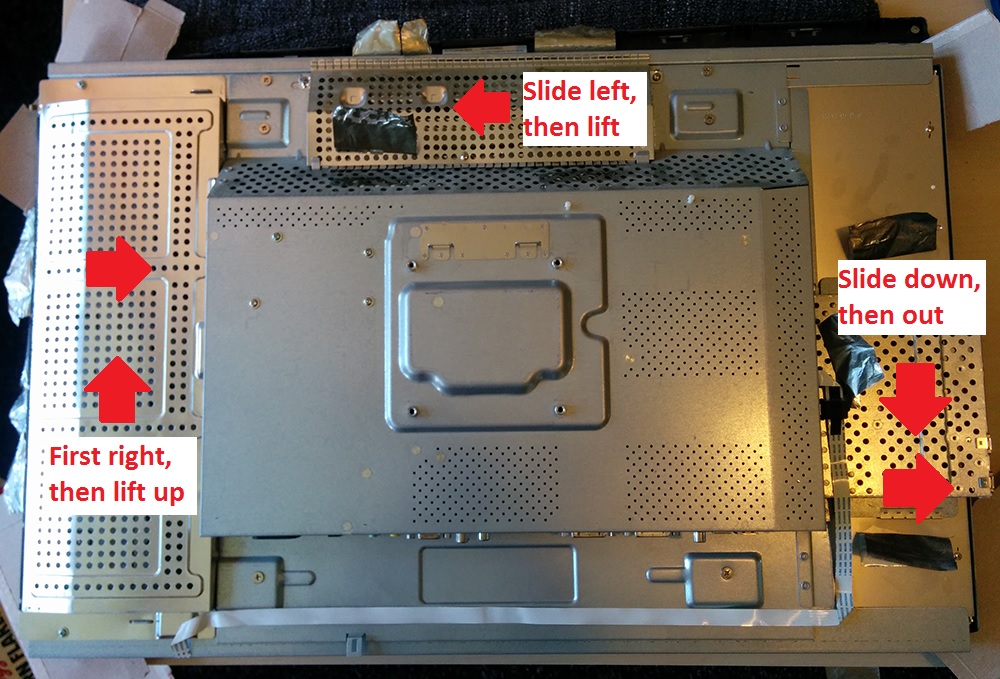
Slide in directions indicated
Carefully lift the back panel a little bit. This might be a little difficult as it is glued down using double sided tape. It is best to lift first from the top to loosen those glues and then from the bottom.
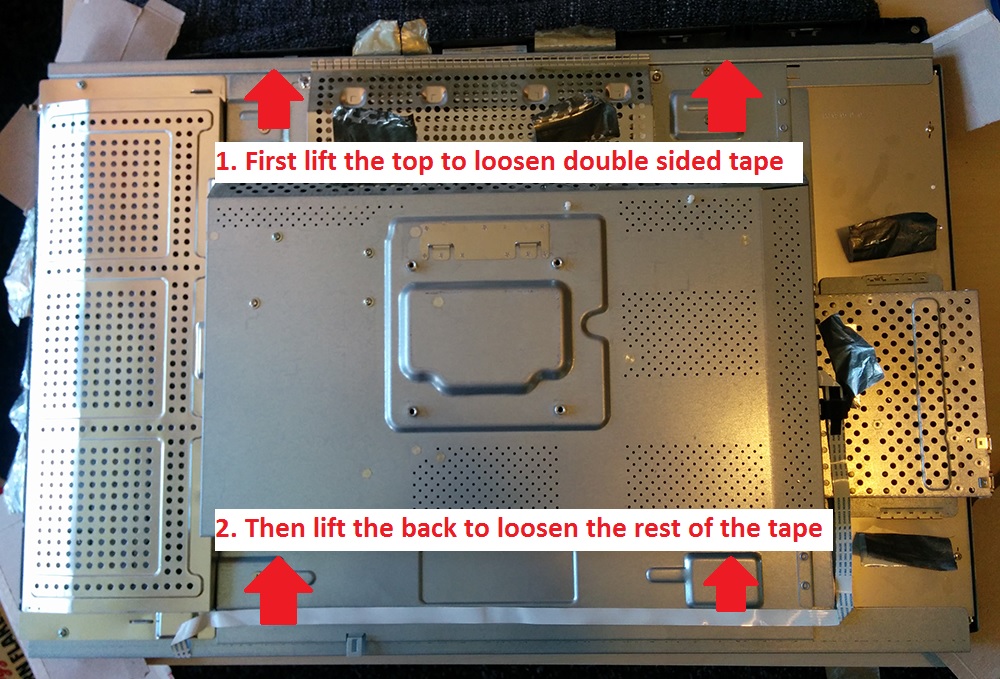
Carefully lift the backpanel
Detach the two cables underneath. It is best to do this from the panel's bottom side (opposite to what is shown in the picture below).
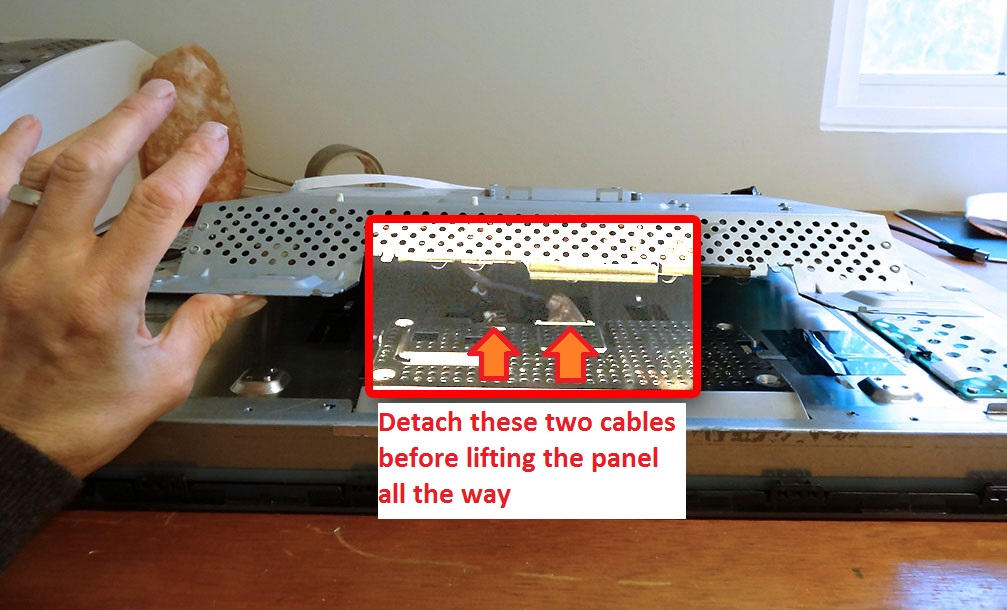
Detach these two cables. Image courtesy of Embalse (forums.overclockers.co.uk)
Flip the back panel over and unscrew the power board (screws are marked on the image below). There is some double-sided tape on the bottom of the board which you might need to heat up before removing (using a hairdryer) to get the unit loose. I however had no problem lifting the unit without heating.
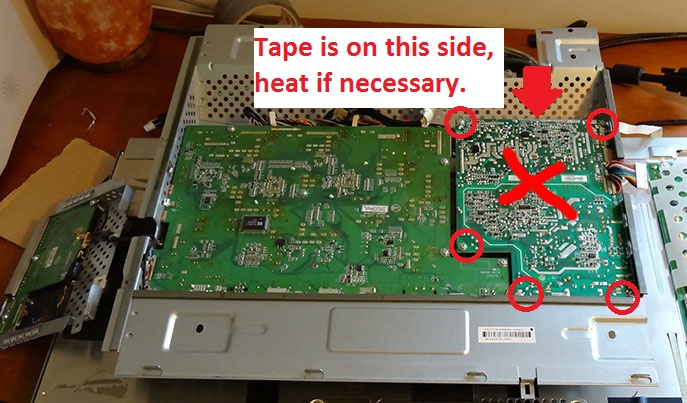
Unscrew the board and remove. Image courtesy of Embalse (forums.overclockers.co.uk)
There are three cables attached to the board that need to be detached.
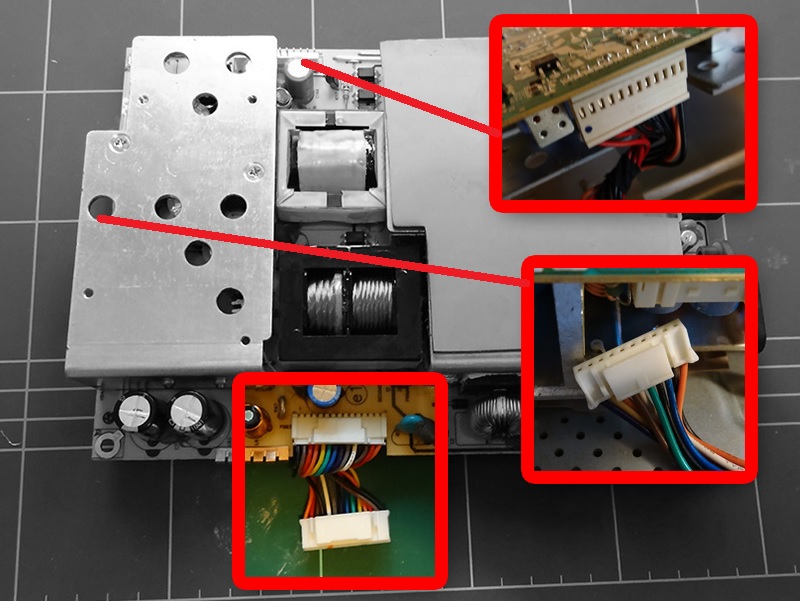
Detach all three cables highlighted. Image courtesy of Embalse (forums.overclockers.co.uk)
Remove the old board from the monitor.
Make sure you transfer this cable from your old board to your replacement one in case it doesn't come with one already.
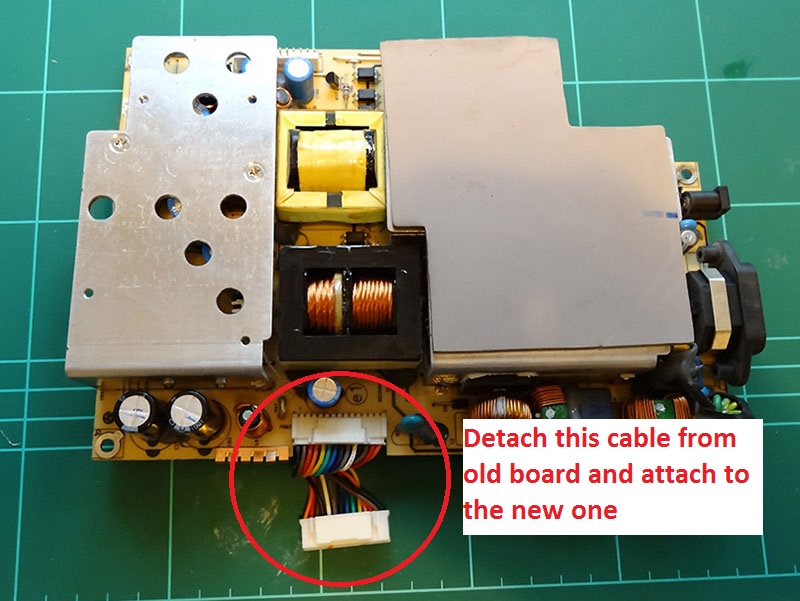
Transfer this cable to your new one. Image courtesy of Embalse (forums.overclockers.co.uk)
Screw your new board into place and attach all three cables to it.
Close up your monitor. I would recommend that you plug the monitor in and ensure that it comes on correctly before clipping the bezel back on.
That is it. Your monitor is now hopefully fixed for only a fraction of the regular repair cost. This whole operation takes you about 1 to 2 hours to complete.
Notes
Make sure you remove all the aluminum tape from the wire-mesh panels in the monitor. They don't glue back and can hinder airflow inside your monitor after re-assembly.
After running the monitor for a while with the new board I noticed a strange heat smell coming from the monitor. In a few hours it is not as noticable but I will update this in a few days with more information.
Update: 4 days later my monitor died again. Contacted the seller and arranged a replacement board.

Sverrir
Sigmundarson
Software Developer
For hire
Developer & Programmer with +15 years professional experience building software.
Seeking WFH, remoting or freelance opportunities.